Featured

Who am I?

My name is Brianna Buseman, and I am the author of The Meating Room! I grew up on a farm in SE South Dakota where my family raises cattle.  Being involved in agriculture was a huge part of my life, so much so, I decided I wanted to study it in college.  I attended South Dakota State University where I graduated with a double major in Animal Science and Agricultural Business.  This degree combination let me take a variety of classes, from livestock nutrition, meat science, genetics, and swine production to economics, accounting, and marketing. 

Following graduation, I decided to continue my education and moved to Idaho for graduate school.  In May 2020 I graduated from the University of Idaho with a master’s degree in Animal Science with a Meat Science emphasis. 

Currently, I am the Youth Meat Animal Extension Assistant Professor at the University of Nebraska-Lincoln. In this position, I focus on engaging students and developing materials to teach them about meat science.

Now, what exactly is meat science?  Well, basically it is the study of all things meat:

What makes meat tender? 

What makes meat taste good? 

What steps can we take to make sure meat is safe for people to eat?

What can we do to make sure consumers are satisfied every time they eat a steak, or a pork chop, or (insert whatever cut of meat you prefer)?

PLUS we get to jump into other areas of animal science, like how livestock genetics and nutrition impact meat. Meat science takes every step in the production process, adds it together and serves it to you in the form of a big, juicy, T-bone steak.  So that’s meat science in a nutshell, and I think it’s so cool!

Through my education and in this current position, I have the opportunity to learn a lot of interesting information and hear of cool research that is happening to try to improve the eating experience for consumers. I will use this blog as a way to share some of what I know and continue to learn. I hope this page will become a good resource to help answer any questions you may have about the industry and to demonstrate the steps that go into producing a high quality, nutritious product. For the most up to date content, check out The Meating Room podcast!

Advertisement
Featured

The Meating Room Podcast

Check out The Meating Room Podcast to learn about meat safety, quality and production while you’re on the go! This podcast will include episodes focused on various topics related to meat production and interviews with people involved in the industry. There is a lot of hands that go into getting meat from the farm to your fork, and I hope to highlight those involved through this podcast!  

Ep. 49: Schweid & Sons-The Very Best Burger: Jamie Schweid The Meating Room

Ground beef is the most commonly consumed form of beef in the US. This week, I visited with Jamie Schweid, President and CEO of Schweid & Sons, Inc., a 4th generation, family owned ground beef business. You can find Schweid & Sons burgers in store at Kroger and Publix, or in restaurants such as Five Guys, Fuddruckers and Cheesecake Factory. 
  1. Ep. 49: Schweid & Sons-The Very Best Burger: Jamie Schweid
  2. Ep. 48: Studying the Steak: Dr. Jessica Lancaster
  3. Ep. 47: Art and Science of Aging Beef
  4. Ep. 46: Meat Things to Know
  5. Ep. 45: Beef, Building Opportunities

The History of the US Meat Industry

I recently spent time watching one of my favorite shows, The Food That Built America, on the History channel. This show talks about the background and history of household names of food companies.  From explaining the start of various fast-food restaurants, ketchup, frozen veggies, and soft drinks, the show shows the hard work, struggles and bit of luck that these companies had to go through to get to where they are today. 

The specific episode I was watching was focused on White Castle and the legendary creation of the hamburger. It was said that the burgers were originally cooked as meat balls.  One day, customers were getting frustrated that it was taking so long to get their sandwich, and in a bit of annoyance the cook slapped his spatula on the meat balls and flattened them to the grill. They found that this helped the meat cook more quickly and evenly.  From there the modern burger was born.

Hearing stories like this is really interesting to me. Today, we don’t think twice about where the burger came from, but there was a time that they were an exciting, original product. Similarly, today we don’t really think twice about getting meat from our freezer or buying it at the grocery store. We expect it to be available, high quality, and safe.  But that was not always the case.  Today, we will further discuss some of the history of the meat industry and show just how far we have come.

1640s-Meat was able to be sold or traded in exchange for other goods. In order for this to happen, meat had to be salted, smoked and packed into storage containers to be transported. The term “Meat Packing” originated from the salting and packing of pork in wooden barrels for storage/shipping

1662: William Pynchon-First official commercial meat packer in New England. At this time, much of the meat sold was done so from small retail butcher shops. William’s business grew in Springfield, Massachusetts, where he drove in both cattle and hogs to be butchered.  

1812: Meat Packer, Samuel Wilson, provided beef and pork to the troops during the War of 1812. When Sam was just 14, he joined the continental army where he helped care for cattle, the camp, and butchered and packaged meat products. After the war, Sam partnered with his brother to open E & S Wilson, which was a meat packing company. The business was located on the Hudson river and allowed the brothers to easily move their product. During the war of 1812, soldiers needed meat. Due to their great location and ability to ship product, E & S was the perfect company to ship the product. E & S was contracted to send 2,000 barrels of pork and 3000 barrels of beef to soldiers throughout NY and New Jersey for a year. At this point, Sam became a meat inspector for the army, ensuring that the meat was safe and packaged correctly. While spending time with the soldiers, Sam supposedly became known by his more well known title, and what we know his as today “Uncle Sam”.

1827: Following a time of urbanization, industrial revolution, mechanization, Chicago’s first packing plant was opened. At this point, meat processing was becoming more efficient (nothing like it is today, but very efficient by that days standards).

 1800s: Union Stockyards in Chicago-Major Marketing facility and was known as “Hog Butcher to the World.” Chicago grew as the meat packing capital due to its location. Near livestock, labor, transportation (water and rail), and a market for the products to go to. 

WTTW-Chicago: By the 1870s, the stockyards processed nearly 2 million animals a year.  By 1890, they processed nearly 9 million.  At its peak in the early 1920s, the stockyards employed nearly 40,000 people.

1877: Gustavis Swift electrified production lines and worked with an engineer to engage the first refrigerated railcar. The car, which circulated air over ice to chill the space, allowed for meat to be shipped to the consumers, rather than moving the live animal.

Gustavis partnered with his brother to form Swift and Company. The company’s initial capital in 1885 was $300,000.  When Swift died in 1998, the company was valued at over $25,000,000.

1906: The Jungle-Upton Sinclair-This book focused on showcasing what life was like in Packingtown. Much of the work was dangerous and done without regard to worker safety or sanitation.  Rooms were unventilated, dark. Floors were slippery. The place was dirty and the meat was not kept in cool, clean environment. Workers were paid pennies for hours and days of strenuous labor.

The book was actually intended to be focused on socialism and promoting the socialist party. Though it was a fictionalized story, it showed a true picture of what the meat industry looked like. The book became an international best seller and made it into the hands of President Roosevelt. Following this, Roosevelt started a committee to investigate the working and sanitation conditions of these slaughterhouses. The committee realized that was written was true.

Because of this, the Meat Inspection Act was put into place. This act includes Antemortem, postmortem, carcass inspection, sanitary standards, USDA inspection required for product to be checked for wholesomeness prior to sale.

1919: Green Bay Packers were formed. Funds to pay for uniforms came from the Indian Packing Company. They were willing to sponsor the team on the condition that the team be named after the sponsor.

1950s: Meat packing was at its peak.  Pieced together plants that had started in the 1800s were becoming obsolete and new places were being built. Rather than building in the cities, new plants were put near the livestock. These new plants tended to be large, spacious, well lit, easy to clean, and well designed for efficiency. Additionally, most plants specialized in one specie or segment of production. 

With the invention of refrigerated railcars, improvements in sanitation and packaging, product was now safe to be shipped around the country. 

Because of advancements in efficiency and the ability to ship meat products more efficiently than live animals, processing plants moved away from Chicago Packingtown, and in 1971-The last kill floor at the stockyards was closed.

Today:

>6,000 federally inspected meat and poultry facilities

Directly employs >525,000 people

Allied Industries employ ~5.4 million people, ~$200 billion in wages

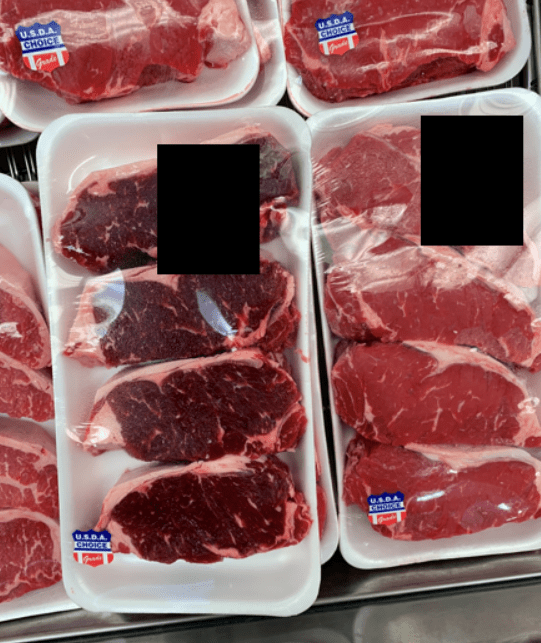
The US has an incredibly safe and reliable food system. Although there may be concerns based on production system or methods, overall, consumers trust their food. And they should.  The industry has come a long way, and continues to improve in food safety, worker safety and production efficiency and continues to make improvements every day. I think it is pretty cool to see just how far we have come, and how much further we will continue to go.

Click here to hear The Meating Room podcast episode on this topic.

Sources:

The Constitutional Rights Foundation

Development of the US Meat Industry

Principles of Meat Science

Creating Great Tasting Steaks

How to make a great tasting steak (or pork or lamb chop):

  1. Start with an animal genetically inclined to produce a high-quality product.

Genetics + Environment = Phenotype

Basically, the genetic background of the animal, plus the environment it is raised in determines its physical appearance, or phenotype. Meat quality and quantity is a portion of that phenotype.

Utilizing genetic data, farmers and ranchers can select for specific quality traits for their livestock. For example, using ultrasound, measurements of a bull’s ribeye can be taken to estimate its size and marbling score.  Knowing these numbers can provide an estimate of what the offspring will look like and be able to produce.

2. Feed the animal correctly to let it reach its maximum genetic potential.

The environment portion of the equation can consist of the animal’s surroundings, diet and lifestyle. In order to best maximize final product quality, animals need to be fed a high energy diet. Doing so will allow the animal to meet its full genetic potential.

For example, say twin steers each were fed different diets. One of them was fed a low energy, forage (ex. grass) based diet, while the other was transitioned to a high energy, grain (ex. corn) based diet.  Both animals have the same genetic background, but their environment can have a major impact on the final product. Likely, the steer fed the high energy diet will produce a ribeye that has more intramuscular fat (marbling), which is associated with a higher quality product.

3. Keep the animal stress free and comfortable.

Stress can have a major negative impact on final product quality. Stressed animals can produce product that has color defects, limited ability to retain moisture, and tenderness problems. All these things can devalue the product, hurting the bottom line of the producer and the processor.

4. Harvest the animal efficiently.

Effectively rendering the animal unconscious and correctly exsanguinating it are imperative for maintaining product quality as well as ensuring humane handling. If the animal is not exsanguinated quickly and effectively, an increase in blood pressure can cause the capillaries within the muscle to burst, leading to splashes of blood within the meat. Not only is this unsightly to the consumer, but it also can poorly impact taste and can shorten shelf life.

5. Age the meat to allow time for natural tenderization to occur.

Storing the meat in a refrigerated environment for a period of time prior to cutting retail cuts allows natural enzymes found within the meat to breakdown protein and improve tenderness. Optimally, beef is aged for approximately 14 days, but can vary due to cut, demand, and storage space at the processing facility.

6. Cut steaks and keep them free from contamination that could impact taste and safety.

Meat can pick up contamination on surfaces as well as absorb off odors and flavors. Because of this, it is necessary to keep the environment clean and controlled. Contaminants can impact taste but can also be a food safety concern.

7. Package and store correctly.

Poor packaging and storage can lead to meat that can quickly develop off flavors or become rancid. Oxygen and light exposure can impact the color and flavor of meat products. Storing cuts in packaging that limits exposure to both is important to maintain a high-quality product. Additionally, keeping meat frozen and only thawing it as you need it is also a great way to keep quality and safety in check. For the best, safest eating experience, plan and thaw meat products in the fridge rather than on the counter or in the microwave.

8. Don’t overcook it!

Undercooking meat products is a food safety concern; however, overcooking them can lead to a product that is tough and dry. Using a meat thermometer is your best bet for a safe, high quality eating experience.

Who would have thought something as seemingly simple as a steak could be so complex? All these steps can add up to create a great tasting product. Similarly, an error at any point can hurt the final product (ex. great quality product that gets forgotten on the grill and is overcooked). One of the exciting things about careers in meat science is that we are constantly studying ways at every point throughout this process to try to improve the final product. We want to ensure a great eating experience every time that product is consumed!

Grain vs. Grass

A topic that is consistently discussed in the beef industry is the differences in grain fed vs. grass fed beef products. Debates cover the diet, cost and quality of the final product. So, which is really better?

Grain fed

Excess energy from a grain finished diet is often stored as marbling. A ribeye with a slightly abundant amount of marbling would qualify for USDA Prime and would likely offer a better eating experience than one with a slight amount of marbling (USDA Select).

This is seen as the “traditional” way of feeding cattle today in the US.  On this diet, cattle can be fed a combination of grass and grains. Grain finished diets are high in energy and allow cattle to build muscle and deposit fat. Grains that may be included in the diet include corn, distillers grains, oats, barley, various forms of silage, and more.

Excess energy is stored as intramuscular fat, or fat that is within the muscle, commonly known as marbling. High levels of marbling are associated with a high-quality product that would be expected to be tender, juicy and flavorful.

The price of grain fed beef can vary based on quality grade (ex. A USDA Prime ribeye will cost more than a USDA Select ribeye). Although there is variation in price within the product, there are plenty of nutritious, affordable, great tasting beef products on the market.

Grass Fed

Typically, grass fed beef is seen as a niche market.  To fall within the grass fed category, cattle must be 100% forage fed after weaning and offered continuous access to pasture. Forages allowed on the grass fed diet include grass, legumes, some cereal grains (pre grain state), hay, crop residue without grains, and a vitamin and mineral mix. 

Due to the grass centered diet being lower energy, it takes a longer period for cattle to be ready for harvest compared to their grain fed counterparts.  Additionally, grass contains a high level of beta-carotene (what is converted to vitamin A, high levels in things like carrots, peas, spinach, etc.).  Because of this, fat associated with grass fed beef is often a yellow color, compared to the bright white color typically associated with grain finished beef.

Since grass fed beef is seen as a niche item, it often will come at a higher price point than the same cut, same quality grade, grain finished product. For example, Walmart sells USDA Choice, grain finished, NY strip steaks for $10.97/lb. They also sell USDA Choice, grass finished, NY strip steaks for $12.96/lb.

Which is Better?

Simply put, grain fed and grass fed beef are both great options. One of the awesome things about the food system in the US is that consumers have a choice. You have the opportunity to choose what cut, quality, and price point best suits you.  

Beef from both grain finished and grass finished animals offers 10 essential nutrients that are necessary for a healthy diet. Beef is an incredible source of iron, choline, protein, vitamins B6  and B12 , phosphorus, zinc, niacin, riboflavin and selenium. Additionally, all meat that is sold in the US is legally required to be processed under USDA inspection to ensure food safety. Whether grain or grass finished, you can trust that you are serving your family a safe, nutritious, great tasting product.  

Considering Color

Imagine you are buying steaks for your family. You walk up to the counter at the grocery store to try to decide which package to buy. What do you look for?  For many people, one of first things that is taken into consideration is the color of the product. In fact, one of the primary factors for discounting meat products is discoloration. Although the product may be perfectly safe, nutritious and delicious, off-color is off-putting to many consumers.  Variation in meat color can be caused by many different factors.

Meat gets its color from the myoglobin that is present in muscle tissue. During life, myoglobin carries oxygen throughout the muscle and is what is responsible for the red color primarily associated with meat. When meat is thawed, myoglobin and water are released creating purge, a liquid often confused with blood. Different muscles have different amounts of myoglobin depending on their use.  The more active they are, the more myoglobin present as the muscle requires more oxygen. The level of myoglobin within the muscle can vary based on muscle fiber type and maturity of the animal.

Type 1 muscle fibers are used for long term locomotion (cross country runner) and have higher amounts of myoglobin. Cattle have predominantly type 1 muscle fibers. Beef are locomotive animals and often are consistently walking to reach water and feed sources. The high levels of myoglobin within their muscles create a bright, cherry red colored meat.

Type 2 muscle fibers are used for short bursts of energy (sprinter) and have lesser amounts of myoglobin. Chickens have predominantly type 2 muscle fibers (there are varying degrees of type 2 fibers, but we won’t go into detail on those today). Typically, chickens only need short bursts of energy to make it to their roost or to run for a short period of time. Due to the lower levels of myoglobin, their muscles will have a lighter colored, pinkish tint.

The muscle structure within animals is not strictly one muscle fiber type or another. They can have a combination within they system based on their use (white vs. dark meat). Even breed and production style can cause differences. For example, farm raised turkeys are not required to be very mobile and don’t need sustained locomotion to get food, water, etc.  Wild turkeys, on the other hand, will cover a lot more ground and engage their muscles a lot more.  They produce a meat that is much darker in color compared to their farm raised counterpart.

In addition to muscle fiber type, maturity can impact final product color. As an animal ages, more myoglobin (what carries oxygen to the muscle and makes it red) is present and gives meat a redder color. This is especially evident in beef animals. Veal, or meat produced from a young calf, will often be a pinkish color. Meat from a traditional market steer is traditionally the bright, cherry red color that we are used to seeing at the retail counter. Meat from old cull cows or bulls, is a darker, deeper, red color that is not as appealing to the consumer.

Additionally, preharvest factors, including diet and stress can impact color. When an animal is harvested, the muscle goes through natural changes to convert to meat. One major change is the pH, or acidity level. Living muscle tissue has a nearly neutral pH of around 7.0.  When an animal is harvested, the pH declines, making the meat slightly more acidic (pH of ~5.4).  Stress prior to harvest can affect the rate and level of pH decline, causing variation in color. In beef, long term stress can lead to dark cutters (product that is almost purple in color). In pork, stress leads to a product that is pale in color, soft (doesn’t hold shape) and exudative (losing moisture). Keeping the effect of stress on carcass quality in mind is important when handling livestock at home.

In addition to these factors, genetics, sex, harvest methods, oxygen exposure, etc. can all impact product color. Although not all variation in color is a negative thing (muscle fiber type), some may be an indication of a problem in production (preharvest stress). Understanding the production process is important to be able to identify the cause of color variation and determine if it is necessary to implement a change in production.

Home Harvest

This post was originally published on the UNL BeefWatch webpage under the title “Things to Consider before Harvesting a Market Animal at Home” and was co-authored by Carol Schwartz, NE Extension Educator. Given the influx of market ready animals following plant shutdowns/slowdowns as well as backup at the local processor level, many people have considered trying a butcher project at home. Now, this may be a good idea for some, however, it can be a big undertaking with a lot of necessary prep work.

Many people are looking for opportunities to buy market animals to harvest at home, which has led to many questions about the best way to complete that task. Prior to making the decision to try home harvest, there are a few important things to consider:

1.  Food Safety:  Can you properly cool the carcass and keep it clean to ensure meat safety?
One of the main concerns when harvesting livestock at home is temperature. If handled poorly or not stored properly, meat can be a great place for bacteria to grow.  It is important to cool the carcass to 34-45F within 24 hours after harvest. In addition to environmental temperature, care needs to be taken to decrease the chance of carcass contamination (feces, dust, etc.) that could lead to bacteria growth. Furthermore, meat can absorb off odors and flavors from the environment.  Scents such as manure, gasoline, etc., can be absorbed and lead to problems with odors and flavors within the meat. If harvesting at home, it is necessary to ensure the environment is cool and clean.

A beef carcass is likely to be >850 lbs. This requires a cold area to thoroughly cool as well as the right equipment to safely and effectively break it down into cuts.

 2.  Animal Welfare:  Can you ensure humane handling and stunning?
Having the ability to handle livestock humanely both prior to and during harvest is of utmost importance.  This means limiting animal stress and having the ability to effectively stun and exsanguinate (bleed out) the animal quickly.  

 3.  Meat Quality:  Can you effectively harvest the animal without negatively impacting meat quality?
Meat quality is focused on the palatability of the final product. If livestock are excessively stressed prior to harvest, quality issues can ensue.  In beef, long term stress can lead to a product that is dark, firm and dry, known as a dark cutter. This effect produces a product that not only is unappetizing, but also retains moisture, making it more susceptible to bacteria growth.  In pork, short term stress can lead to a product that is pale, soft and exudative; meaning it is light in color and is not able to hold water well. This results in product that is dry and not very flavorful. Additionally, if exsanguination is not performed quickly and effectively, blood splash can occur within the muscle. A significant challenge when harvesting livestock at home is aging the product to improve tenderness and palatability. Aging requires refrigerated storage space that is clean and limits potential for bacteria growth. Holding meat in refrigerated storage for 7-14 days prior to cutting into retail cuts (steaks, chops, roasts) is beneficial to improve the final product’s palatability and overall eating experience.  

 4.  Equipment/Facilities:  Do you have the equipment and facilities to work efficiently, ensure worker safety, maintain a cool environment, and store the final product?
From start to finish, the process of harvesting livestock offers potential for worker injury.  Having good equipment and knowledgeable help is necessary to ensure efficiency and safety.  Prior to harvest, it is necessary to think about what type of equipment you may need, such as sharp knives, hoists, meat saws, packaging and much more. As the meat is being divided into retail cuts, it is necessary to keep a cool environment to limit bacteria growth. Once the carcass is packaged into steaks and roasts you will need plenty of freezer space for storage. Meat from a whole hog will require approximately 5 cu. ft. of freezer space, whereas meat from an entire beef animal will require approximately 16 cu. ft. of freezer space.

Packaging and storage space are extremely important to consider prior to harvest. Air tight packaging not only helps keep the product safe, but also retains quality (ie. palatability).

Although it may seem like a simple task, home harvest is very labor intensive and requires a lot of planning. While it may be a good decision for some, it is important to think through the entire process prior to making the decision to harvest livestock at home. If unable to confidently answer the questions about how to handle food safety, animal welfare, meat quality and equipment, it may be beneficial to consider other options for harvest.

Steak Science: Making a Marinade

A few weeks ago I had the chance to be featured on Nebraska 4-H Living Room Learning. This program focuses on sharing activities with students that can be done at home to teach lessons in science, math, engineering, and more. The lesson I taught was focused on meat science, and discussed how to make a marinade.

Using marinades when cooking is a great way to add flavor and improve tenderness of various meat products. There are a few key ingredients that should be used when mixing marinades in order to have the best results.

Oil: This is used to bind ingredients and can help seal in moisture during cooking. I prefer to use olive oil, but any cooking oil will work.

Acid: The acid helps improve tenderness by breaking down protein. Common acids that can be used in marinades are lemon and lime juice or white wine.

Flavor: This is where you are going to add in your key ingredients to create a specific flavor profile. Are you hoping to cook a product that is savory? Spicy? Has some sweetness? Using various herbs, spices and other seasonings allows you to create a specific flavor profile. Some common ingredients include garlic, chili powder, brown sugar, mustard, pepper and onion powder.

Salt: This is a key ingredient for flavor, but also helps the marinade penetrate into the cut you are working with. It is important to be careful with the amount of salt you add to the mixture as it can quickly produce an off putting flavor and can draw out moisture in the meat, leaving you with a final product that is dry.

When mixing your marinade, plan for a 1/4 to a 1/2 cup of marinade per pound of meat. Place the meat in a resealable bag or container with a lid and pour the marinade over the meat. To keep the product at a safe temperature, make sure to marinate it in the fridge. The length of time that you will marinate depends on what cut you are using and your goal for the marinade. If you are using a tougher cut with the goal of improving tenderness (round steak, sirloin steak, etc.) marinades can be used for 6-24 hours. If you are simply trying to add flavor (chicken, strip steaks, etc), marinate for 20 minutes-2 hours. Do not mix or store your marinade in a metal container. The acid can react with the metal, producing off flavors and can damage the container.

Marinades are a great way to improve tenderness and change the flavor profile of your favorite cuts. There are a lot of great recipes out there, but it is also a fun way to experiment in the kitchen and develop your own favorite flavor profile. This is your opportunity to perform your own steak science experiment. The best part? You get to eat your research!

Garlic Herb Marinade:

  • 2 Tbsp olive oil
  • 2 Tbsp white wine or lemon juice
  • 1 Tbsp Italian seasoning
  • 4 cloves minced garlic (1 Tbsp minced garlic)
  • ½ tsp salt
  • ½ tsp pepper
  • 1 lb of meat

Mix all ingredients and pour over cut of your choice. This recipe will make enough marinade for 1 lb of meat. I used round steak when I did this talk. After letting it soak in the marinade for approximately 16 hours, I grilled the steak to medium, sliced it thin and served it over greens for a steak salad.

Check out the “Steak Science” episode on NE 4-H Living Room Learning!

Every Cut has a Consequence

When I first started graduate school for meat science, I had very little experience cutting meat.  I had taken a few meat science courses in my undergrad, but they were focused on the science that goes into meat production. While pursuing my master’s, I had the opportunity to spend a lot of time in the meat lab and got plenty of cutting experience.

Now, every time I get to help on the fab floor, I can hear one of my professors telling me, “Every cut has a consequence.”

This phrase stuck out to me because it reminded me of opportunity cost, a concept I learned in economics that really made sense to me.  Opportunity cost is basically what you give up by choosing to purchase something.  For example, I could buy a new sweater, or I could buy 5 cheeseburgers from Culver’s.  If I buy the sweater, my opportunity cost is the cheeseburgers. I am giving up my ability to purchase them.  If I buy the cheeseburgers, I am giving up the sweater.  As a poor college student, this concept was crystal clear. (I should add, I bought very few clothes in college because I always chose the cheeseburgers. Very rarely would I actually spend that much on burgers, so I saved myself a good chunk of cash and calories).

Opportunity cost relates to “every cut has a consequence” because every cut you choose to make when fabricating meat is a choice against another product.  Let me break this down with an example.

Porterhouse and T-Bone steaks, vs. Filet Mignon (tenderloin) and NY Strip. These steaks seem to have a lot of differences, but in reality they are one in the same.  A Porterhouse is made of the Psoas major (aka Filet Mignon or tenderloin) and the Longissimus dorsi (aka NY Strip), while a T-Bone is primarily the Longissimus dorsi and maybe a small portion of the Psoas major. The only difference is that the Porterhouse and T-Bone remain bone-in. The consequence of leaving the bone in and cutting Porterhouse and T-bone steaks is not being able to get Filets and NY Strips.  Likewise, choosing to remove the bone and cut Filets and NY Strip steaks means that Porterhouses and T-Bones will not be kept.  Every cut has a consequence.

There are benefits and drawbacks to both products. Porterhouses and T-Bones are difficult to cook correctly.  The muscles have difference characteristics and are different sizes.  Those things, plus the addition of the bone make it difficult to get a consistent cook. Additionally, if you are buying them at the grocery store, you are paying for the bone, an inedible product. On the plus side, they taste good.  The filet is the most tender muscle on a beef animal and a NY strip is a very high-quality cut.  You get the best of the best in one cut.

Now, on the flip side, cutting Filets and NY Strips instead of Porterhouses and T-Bones results in two steaks that are very consistent and therefore easier to cook.  If you are cooking a grill full of Filets or NY Strips, it is much easier to get a good, consistent cook than trying to account for two totally different products at once. When you buy the product from the grocery store you are paying for meat.  There may be small amounts of plate waste from fat or connective tissue, but you are not paying for bone that will be discarded later. Choosing to de-bone and have 2 cuts will also lessen the portion size (positive or negative depending on your appetite).

So whether you’re working with your local butcher on how you would like your beef cut or buy steaks at the grocery store, remember that every cut has a consequence.  Luckily in this case, there are no bad consequences, only great tasting products!

Simple Steak Science: Yield

I got great feedback from my last post about using pineapple and jello to explain tenderness in beef.  This week, I will once again use a pineapple to explain a really important topic in meat science, yield! 

Yield answers the question of “how much?” How much meat can we expect from the carcass? How much boneless, closely trimmed, retail cuts will make it to the grocery store?

Now, it will take a little explaining to answer these questions. I personally am not a consumer of plant based meat, but for this post we will use a pineapple to represent a beef animal. Close enough to a steak, right?

Step 1:

The animal is harvested.  Harvest is a term often used instead of slaughter.  When an animal is harvested, the head, hide, hooves, blood and viscera (internal organs) are removed.  What is left is referred to as the “hot carcass.” The carcass is composed of muscle (meat), bone, fat and connective tissue.  Similarly, when cutting up a pineapple, the first step is to remove the top, bottom and outside, leaving behind the edible fruit and core.

Step 2:

Fabricate the carcass into primals.  Fabricate is another word for cut and primals refers to large groupings of muscles.  From here, excess fat is trimmed and bones can begin to be removed. Likewise, spots are removed from the outside of the pineapple and the core is removed.

Step 3.  

Cut the primals into retail cuts.  At this point, the muscle groups can be further portioned into steaks and roasts that will be sold at the retail counter.  Excess fat is continued to be trimmed and remaining bones are removed (unless cutting bone-in steaks and roasts, then some bones remain). Once this step is completed, you are left with the yield from that animal, or the boneless, closely trimmed, retail cuts. In a pineapple, once the skin and core have been removed, the fruit can be cut into chunks or slices and is ready to be served.

During this process, a lot of weight is seemingly “lost.”  If you were to bring a 1400 lb. steer to the butcher, it is likely that you will only get about 500 lbs. of meat back.  The weight that is “lost” is in the bones, fat, hide, blood, etc.  However, none of this weight is actually lost.  It can all be used.  Medical supplies, sports equipment, textiles, biofuels, pet food, and much more are all co-products of the meat industry and can be produced using that “lost” weight.  By harvesting the animals for meat, supplies are produced to be used in industries across the spectrum.  Nothing is wasted.

Who would have thought that a pineapple and a steak could have so much in common? Now whether you’re enjoying a bowl of pineapple or a steak on the grill, it is sure to “yield” a great experience!